The purpose of this assignment is to introduce you to Grails and includes:
- Grails Frame work including Domain, Controller and Views
- GGTS integrated development environment
- Database and dbconsole
You are to complete this programming assignment individually. In this assignment you will build a simple web app for a book store’s administrative backend, meaning administrators will be able to add books and authors to the book store’s database.
Step 1: Watch Introduction to Grails videos Grails Example
HU students can skip this step. CS students must do this step. Point your web browser to
https://www.youtube.com/watch?v=PXHxo43hn34 – Getting Started with Grails Part 1, MVC including Domain and scaffolding.
https://www.youtube.com/watch?v=qNFksvLxZNU – Getting Started with Grails Part 2 – Custom UI.
https://www.youtube.com/watch?v=oL4yVtNU31E – Getting Started with Grails Part 3, Custom G-Tags.
Watch the part 1 and part 2 videos. Later, you can watch the part 3 video.
If you need more resources consult the Grails User Documentation
In particular, you will want to study chapter 7 about GORM to learn more about how to make and use Grails models
http://grails.org/doc/latest/guide/GORM.html
For more details about Grails views and controllers, you will want to study chapter 8 about the web layer
http://grails.org/doc/latest/guide/theWebLayer.html
Also on the right hand side of all the documentation web pages is the Quick Reference, but you need to have a wide browser window to view the links in the quick reference.
The documentation is a good reference but is very technical, so you will probably find it hard to understand when you first begin programming. There are good books that give easy explanation of grails.
Step 2: Install an IDE and Grails on your home machine
Although there are several Integrated Development Environments (IDEs) that are appropriate for Grails web app development, I recommend that your team using the same IDE. Then, your team and instructors can help you if there are IDE challenges. GGTS is an Eclipse based IDE that is specialized for Grails. It is free and good IDE.
Below is detail instruction GGTS.
Step 2: Install GGTS IDE and Grails on your home machine and get it running.
The instructions are specific to a Windows machine. If you are using Mac or Linux it might differ some.
1. Download the latest version of GGTS to your home machine into any directory
You will see the link on the right hand side of the page just under the Groovy and Grails emblem. The download is a zip file and takes a few minutes to download. Move the zip file to any directory (I put mine at the root of the C drive in a directory called grails). Unzip the file. (I recommend using 7-Zip for unzipping. It is faster than the Windows compress utility and can handle longer path names.) You can explore the directory structure. At the top most level it i
- gtts-bundle
- ggts-3.6.4.RELEASE
- Several sub directories
- Several files
- GGTS.exe <- This is the executable that starts GGTS.
- grails-2.4.4 <- This is Grails, the web framework.
- legal
- pivtal-tc-server-developer-3.1.0.RELEASE
- ggts-3.6.4.RELEASE
You probably want to make a short cut on your desktop to GGTS.exe, so that you do not have to navigate using file explorer every time you want to start grails.
2. Create your workspace directory before you start GGTS.
GGTS default workspace is in your documents folder.I rather have several workspaces for the different projects. For example, for this course you may want a workspace for the programming assignment and another for the project.
3. Start GGTS.
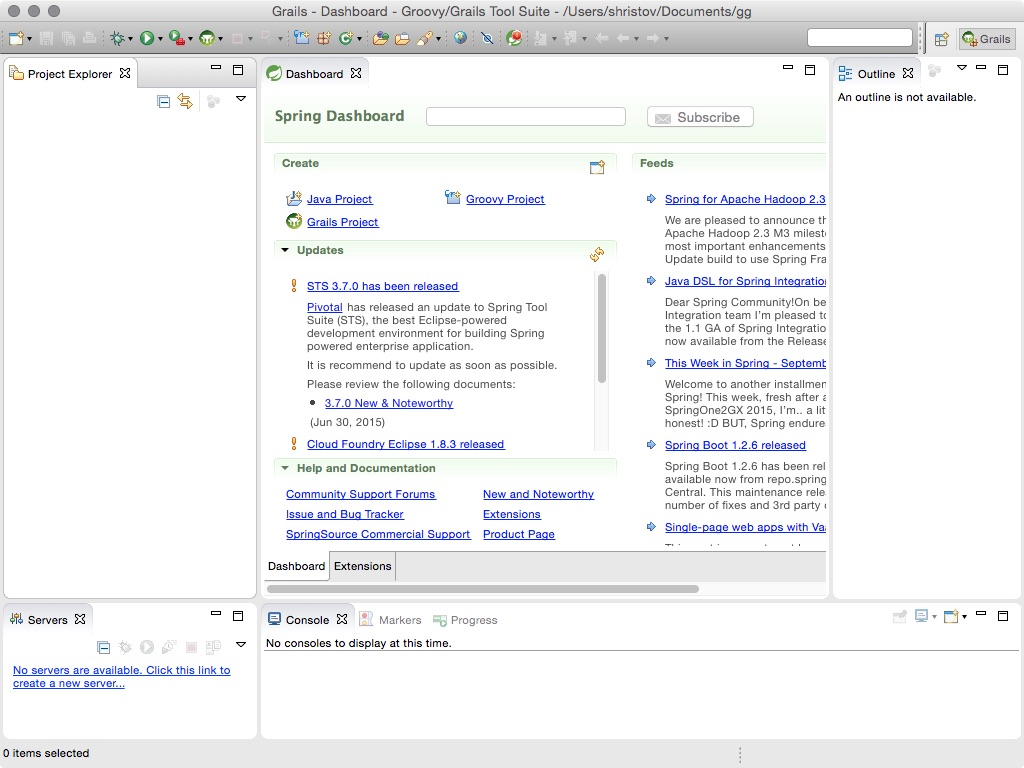
On the introductory screen, browse to your workspace directory and hit OK. In a few minutes GGTS should load and appear. It should look familiar. GGTS is built on Eclipse. In the center is normally the editing window, but the first time starting GGTS the dashboard appears in the editing window. You do not need the dashboard so you can x-out to remove it.
Congratulations GGTS and Grails are on your home machine.
Step 3: Make the Grails project using GGTS.
1. Use the wizard to make the Grails project

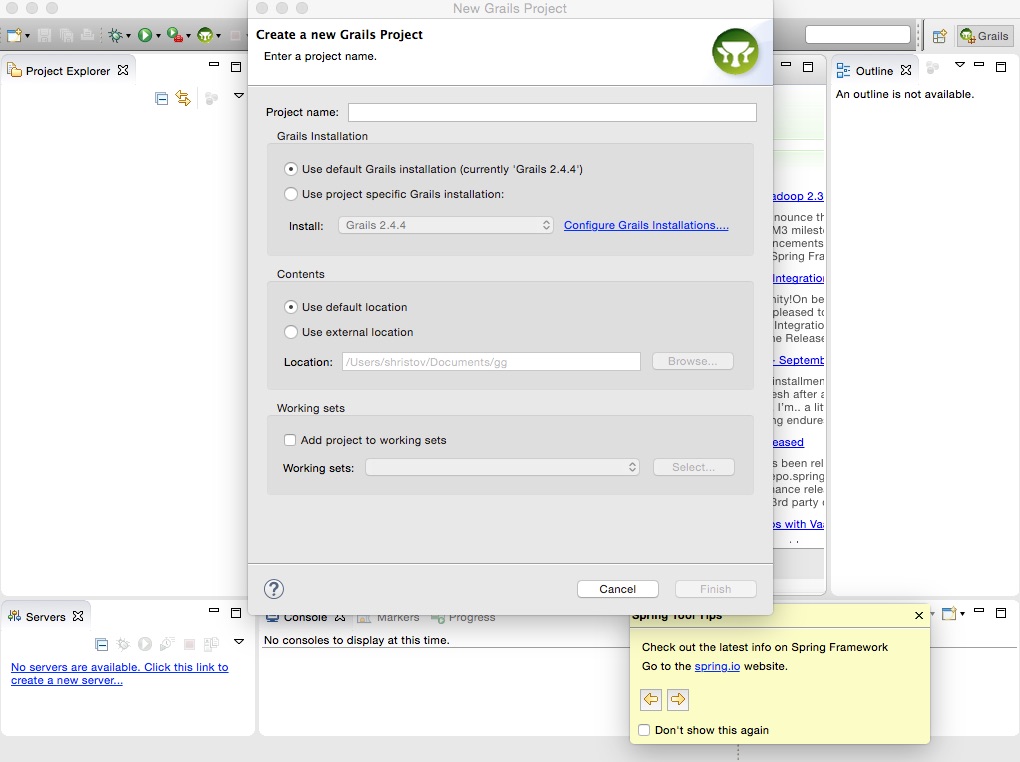
In the left pane is the Project Explorer. Right click in the Project Explorer and select new -> project -> Grails -> Grails Project, then tap Next to start the “Create a new Grails Project” wizard. Type the project name. You may call it “cs4760progassign”. Defaults of the rest of the fields should be OK. Click “Finish.”
A Potential Problem:
Check which version of Grails the workspace is using by clicking “Configure Grails Installation” link in the “New Grails Project” first pane that appears when using the Wizard to make your new Grails project. Note that all projects in the same workspace must use the same version of Grails. Click finish. You may have to refresh dependences. Right click your project then select “Grails Tools” -> “Refresh Dependences.”
You can also find the Grails verision for the workspace by navigating to Window -> Preferences -> Groovy -> Grails.
Another Problem:
If you get an error dialogue saying “Grails requires a JDK.” The project will not build. You should already have a JDK on your machine. Check your system variable JAVA_HOME path. Check that the path is correct. If it is, go to GGTS and click Window -> Preferences -> Java -> Installed JRE and then click “Add”. In the next window, you want “Standard VM” selected and then click “Next.” In the next window, browse to your latest jdk directory and select. When you return to the “Installed JREs” window make sure that the JDK is checked. Then hit “OK”. The project should build now. For reference, see
http://stackoverflow.com/questions/14663528/groovy-and-grails-jdk-issue
Note Grails 2.5 or 2.4 are not compatible with Java 1.8 (aka Java 8) so you should use Java 1.7 (aka Java 7). So check that you are using jdk1.7. If you do not have jdk1.7 (aka Java 7), you can download it at:
http://www.oracle.com/technetwork/java/javase/downloads/jdk7-downloads-1880260.html
Check the Java Compiler setting by selecting the project then Project in the menu -> properties -> Java Compiler (in the pop up window). The window should have “Enable project specific settings” unchecked. Click on “Configure Workspace Settings…” link. The second pop up window should have “1.7” selected for “Compiler compliance level” and “Use default compliance settings” checked.
Third Problem:
Comment out (delete) the grails.project.fork map. In the Project Explorer expand “conf” to view the configuration files. Double click BuildConfig.groovy. In BuildConfig.groovy file, comment out the lines from just above “grails.project.fork = [” to just below the terminating square bracket, “]”.
The fork does not work well and you do not need it. With the fork in place you’ll not be able to terminate your running app by using the red square icon in the toolbar.
2. Test that the project build.
Select your project in Project Explorer.Then right click -> Run as -> Grails Command (run-app). Or you can tap the run icon in the menu bar and select run-app. Grails and Java compile the app. When the compile is complete you should see in the console the message “Browse to http://localhost:8080/…”. Click on the link and the GGTS browser will load and show the basic index page with access to controllers.
3. Locate your View and Assets Folders
In Views, you will be able to edit and modify the structural HTML/HTML5 elements of the web application, while the Assets folder will hold the CSS files that will control positioning and appearance of the view, web page.
Step 4: Make Domain Classes.
You will implement a simple database scheme. You need to table in the database, an Author table and a Book table:
Database Scheme:
Author:
- String Name
- has many books (list of entries in the Book table)
Book:
- String Title
- belongs to author (entry in the Author table)
Read the chapter about GROM in the Grails documentation to learn how to specify the Domain classes, Author and Book. Specifically, you’ll want to read carefully the section about GROM association:
http://grails.org/doc/latest/guide/GORM.html#gormAssociation
You do not need to understand the GORM Manual to complete this assignment. The assignment can be completed without deep understanding GORM. Just follow the instructions and “cut and paste” as instructed. CS4760 students should know what they are doing and can reference the GORM Manual for understanding.
You should see that the Author class references the Book class and the Book class references the Author class. This is cyclic references and can confuse the auto compiler in the IDE, if you just write the code for the classes sequentially. If you type up the Author class before there is a Book class then your code will have an error at the line referencing the Book class. Instead of writing the classes sequentially I suggest first making both empty Author and Book domain classes by right clicking on the project, select new -> Domain Class. Fill in the name of the domain class: Author or Book, and finally “Finish.” After creating both the Author and Book domain classes, you can type the references to other class without error.
Click on the Author.groovy file in the left hand navigation pane that should open the Author.groovy in the edit screen. “Cut and paste” the code below into the edit pane for :
package cs4760progassign

class Author {
    static hasMany = [books: Book]
    String name

    static constraints = {
    }
}
The file should look exactly as above.
Click on the Author.groovy file in the left hand navigation pane that should open the Author.groovy in the edit screen. “Cut and paste” the code below into the edit pane for the Author.groovy file:
package cs4760progassign

class Book {
    String title
    static belongsTo = [author: Author]

    static constraints = {
    }
}
The file should look exactly as above.
After creating the domain classes, you will want to test the compile again. If you do that you might see in the console the following error:
…
 |Running Grails application
 Error |
 2014-10-06 15:17:42,652 [localhost-startStop-1] ERROR hbm2ddl.SchemaExport - HHH000389: Unsuccessful: alter table book drop constraint FK_ad77oefv8m27ohs42aiyagj2s if exists
 Error |
 2014-10-06 15:17:42,652 [localhost-startStop-1] ERROR hbm2ddl.SchemaExport - Table "BOOK" not found; SQL statement:
 alter table book drop constraint FK_ad77oefv8m27ohs42aiyagj2s if exists [42102-176]
 |Server running. Browse to http://localhost:8080/cs4760progassign
The error is not really, rather a bug in Grails. You can point the browser to the URL and the standard start page will show. You can also inspect the database (see below) and the Author and Book tables have been created. Nevertheless, the error is annoying and confusing. To fix the bug see:
http://stackoverflow.com/questions/23858953/grails-2-4-and-hibernate4-errors-with-run-app
The basic procedure is to create the java class:
package cs4760progassign;

import org.hibernate.dialect.H2Dialect;

public class ImprovedH2Dialect extends H2Dialect {

    @Override
    public String getDropSequenceString(String sequenceName) {
        // Adding the "if exists" clause to avoid warnings
        return "drop sequence if exists " + sequenceName;
    }

    @Override
    public boolean dropConstraints() {
        // We don't need to drop constraints before dropping tables, that just
        // leads to error messages about missing tables when we don't have a
        // schema in the database
        return false;
     }
}
Right click the project and select new -> Class and then enter the name of the class, ImprovedH2Dialect. This will put the Java class file in the “src/Java” folder in your project. Copy and paste the above code into the class file. Save the file when you are done.
You will also have to add a line to the DataSource.groovy configuration file. In the left hand pane click the arrow to the right of “conf” and then double click DataSource.groovy. Add the line:
dataSource.dialect = cs4760progassign.ImprovedH2Dialect
to the bottom of the DataSource.groovy configuration file, below the the last “}”. Save the file. Now you can run the app and will not see the error message in the console.
Step 5: Inspect the database.
HU students can skip this step. CS students must do this step. You will want to inspect the database to verify that it has really made the tables. When you code more complex projects, you can inspect the database directly to see if the SQL actions are preformed as you expect.
Point your browser to
http://localhost:8080/cs4760progassign/dbconsole
This will bring up the database login. Note that in the login screen the JDBC URL should match what is specified in the DataSource.groovy configuration file. So if you running in a “development” environment the JDBC URL should be
jdbc:h2:mem:devDb;MVCC=TRUE
The user name should be “sa” and password should be blank. Click “Connect” button and data browser will appear. You should see the Author and Book tables listed on the left panel. Expanding them you’ll see the fields for each table. Clicking the Author table will enter the SQL command:
SELECT * FROM AUTHOR
You can click the “Run” button to execute the command. Do so you’ll see that the table is empty because you have not add entries to the table.
Step 6: Add entries to the Tables.
You can use the Bootstrap.groovy configuration to add entries to the table during. Click the arrow to the left “Conf” in the left hand pane. Double click Bootstray.grooy to open the Bootstrap.groovy file into the editor and add the following code to the init closure.
import cs4760progassign.Author
import cs4760progassign.Book

class BootStrap {

    def init = { servletContext ->
        new Author(name:"Stephen King")
             .addToBooks(new Book(title:"The Stand", publishYear:1978))
             .addToBooks(new Book(title:"The Shining", publishYear:1977))
             .save()

        new Author(name:"Mark Twain")
            .addToBooks(new Book(title:"Tom Sawyer", publishYear:1876))
            .addToBooks(new Book(title:"Huckelberry Finn", publishYear:1884))
            .save()

    }
    def destroy = {
    }
}
Now stop the app and run it again. CS students should point the browser to the dbconsole and inspect the tables you should see the entries in both the Author and Book tables.
Step 7: Generate the Controller and Views
Grails will generate the basic controller and all the views for the domain classes. To make the controller for Author domain class, right click the project and select “Grails Tools” –> “Open Grails Command Prompt” and type
generate-all cs4760progassign.Author
Make sure the correct project specified.
This will make several files for you:
- controller/AuthorController.groovy
- views/author/_form.gsp
- views/author/create.gsp
- views/author/edit.gsp
- views/author/edit.gsp
- views/author/index.gsp
- views/author/show.gsp
- test/unit/AuthorController.groovy
You should inspect these files and learn from them.
Generate all the Book controller and views. Open the Grails command prompt by clicking on the Grails icon, looks like a white grail in a green disc. Cut and paste the command below:
generate-all cs4760progassign.Book
This will make similar views and controllers as for Author.
Step 8: Use the Web App
You can run the web app. Stop and start the app again. The starting index page should show the Author and Book controllers.
If you make a change to the Domain class you’ll have to generate all the controllers and views again. The generate-all command will ask you to replace the files. You may need to delete all the generated files before you can make them again.
Use the app to create a new author and add a book to the author. View the Author and Book list to see that it is in database. Also go to dbconsole to inspect the tables directly.
Delete the author “Stephen King” and then view the book list. The books “The Stand” and “The Shining” should be gone from the list because of the static property “belognsTo” in the Book domain class.
Step 9: Change Cross Reference Listings
HU students can skip this step, but CS students should preform this step.
Using the web app, you should have noticed that when you show an author the books that are listed are referenced by the table (cs4760progassign.Book) and the id. Also showing book list shows the authors by the table and the id. This is not an error but it might not be what you want. You probably expect that the book reference ought to be the book title and the author reference should be the author’s name. We can change the behavior by adding a toString method to the domain model.
In the Author domain class, add the lines below:
String toString(){
 "${name}"
}
In the Book domain class, add the lines
String toString(){
 "${title}"
}
You’ll need to stop and run the web app again for the changes to the domain to take place. Now ty the web app, you notice that Author is referenced by name and Book by the title. The code in the toString method tells the view how to render the view. The dollar sign, $, are grails tag that alert the view that within the curly bracket is groovy code, in this case a parameter of the method.
In general, you should be careful making these changes. The problem with our change is that the name of the author may not be unique, meaning two authors may have the same name. So, this will cause ambiguity when associating a book with an author. In the next assignment you’ll see that my general strategy is to use the generated views only for the administrated backend of the website and that we’ll make public views by hand coding. The admin should understand the references to book and author are table and id, and consequently the admin would not be confused.
Step 10: Make the Screen Shot and Email Me
After creating a new author, adding a book and deleting the author “Stephen King”, make a screen shoot of the book list. The URL is
http://localhost:8080/cs4760progassign/book/index
If you are a cs4760 student, email me (pastel@mtu.edu) the screen shot. The subject of the email should be
“cs4760 Programming Assignment 1 Proof”
If you are an hu4642 student, email Stefka the screen shot. The subject of the email should be
“hu4642 Programming Assignment 1 Proof”
Congratulations, you have completed your first programming assignment and made your first web app.